Understanding Warehousing Modes in Helm
Choose between Basic and Full Warehousing Modes to match the complexity of your operation - from simple, single-location setups to advanced multi-location workflows with full pick-and-pack functionality.

Warehousing Modes in Helm
Helm offers two distinct warehousing modes to suit the operational needs of different businesses: Basic Mode and Full Warehousing Mode
Where to Change Your Mode
1 Navigate to Settings in the bottom‑left corner of Helm
2 Select Warehouse from the menu
3 Click Warehouse Mode
4 Choose between Basic or Full

Basic Warehousing Mode
Basic Mode is ideal for smaller businesses or operations with a single warehouse location. It offers a streamlined workflow with minimal setup, allowing users to create shipments and despatch orders quickly without the need for location management or pick lists
Designed for agility and ease, Basic Mode offers:
Small businesses or start-ups
Single-location operations
Fast, no-fuss despatch processes
Businesses that require fast turn‑around and minimal configuration overhead
Key features:
No location tracking required
Manual or automatic shipment creation
Direct label printing and despatching
Streamlined inventory records without the need for complex location hierarchies
Real‑time stock synchronisation across multiple sales channels
Rapid order despatch capability without generating pick lists
Best For:
Start-ups or operations where speed and simplicity outweigh precision location management
Basic Mode: Despatching an Order
In Basic Mode, the despatch process is simplified - perfect for quick and efficient order handling
Step 1: Open the Orders Page
Navigate to the Orders tab from the left-hand menu
Locate the order you wish to despatch using the filters or search
Step 2: Create a Shipment
Click into the order to view details
Select Create Shipment
Choose the items and quantity to despatch
Click Save to create the shipment
💡 If the courier is already configured, a label will be generated automatically once the shipment is created
Step 3: Print Labels and Despatch
Navigate to the Shipments tab
Select the newly created shipment
Print the label and mark the shipment as Despatched
✅ That’s it! Your order is now on its way

Full Warehousing Mode
This mode provides advanced warehouse management, ideal for larger or more complex operations
Elevate your operation with advanced features:
All the benefits of Basic Mode plus granular location tracking (aisles, bins, shelves)
Batch pick list generation to optimise picker routes
Detailed stock movement logs for precise auditing and traceability
Full inventory location tracking
Pick list generation and management
Support for pick waves and batch despatch
Accurate stock visibility by location
Perfect for
Larger warehouses, multi‑zone facilities or 3PL environments
Businesses requiring stringent inventory control, high pick accuracy and sophisticated reporting
Businesses with dedicated warehouse teams and multiple storage zones or bins
Full Mode: Adding Locations
Locations are essential in Full Warehousing Mode for tracking inventory accurately
Step 1: Navigate to Locations
Go to Warehousing > Locations
Step 2: Add a New Location
Click Add Location
Enter a name or code (e.g. A1-Shelf3)
Choose the warehouse site (if applicable)
Step 3: Set Location Type (Optional)
Define whether the location is:
Pickable – used for order picking
Bulk – used for overflow or reserve stock
Quarantine – used for holding stock on hold or pending inspection
Step 4: Save
Click Save to make the location available for use
You can now assign stock to this location and include it in pick lists
Full Mode: Creating and Performing a Pick
Picking in Full Mode ensures stock is taken from the correct locations for accurate fulfilment
Step 1: Generate a Pick List
Go to Warehousing > Picks
Click Create Pick List
Select the order(s) you want to pick
Choose a picking method (e.g. single, batch, wave)
Click Generate
Step 2: Start the Pick
Open the pick list
Click Start Pick
Follow the system's guide through each item and location
Step 3: Confirm and Complete
As you collect items, mark each as Picked
Once complete, click Confirm Pick
The system will automatically create a shipment from the picked items
Full Mode: Despatching Orders
Once orders have been picked, you’re ready to despatch. There are two main methods:
Option 1: Single Shipment Despatch
Ideal for small or low-volume operations
To use:
Navigate to Shipments
Open the shipment
Print label (if courier is integrated)
Click Mark as Despatched
Option 2: Despatch Terminal
Designed for high-volume operations using scan-and-go stations
To use:
Go to Despatch Terminal from the main menu
Scan the shipment or order barcode
Print the label (automatically or manually)
System will mark the shipment as despatched automatically
You’re done! Orders are now ready for carrier collection
Which Mode Is Right for You?
Basic Mode if you value speed, simplicity and minimal setup
Full Mode if you demand full pick‑and‑pack workflows, multi‑location inventory control and robust auditing
If you remain uncertain, reach out to your Helm onboarding specialist or our support team for tailored guidance and best‑practice recommendations
Where to Change Your Mode
1 Navigate to Settings in the bottom‑left corner of Helm
2 Select My Warehouse from the menu
3 Click Warehouse Mode
4 Choose between Basic or Full
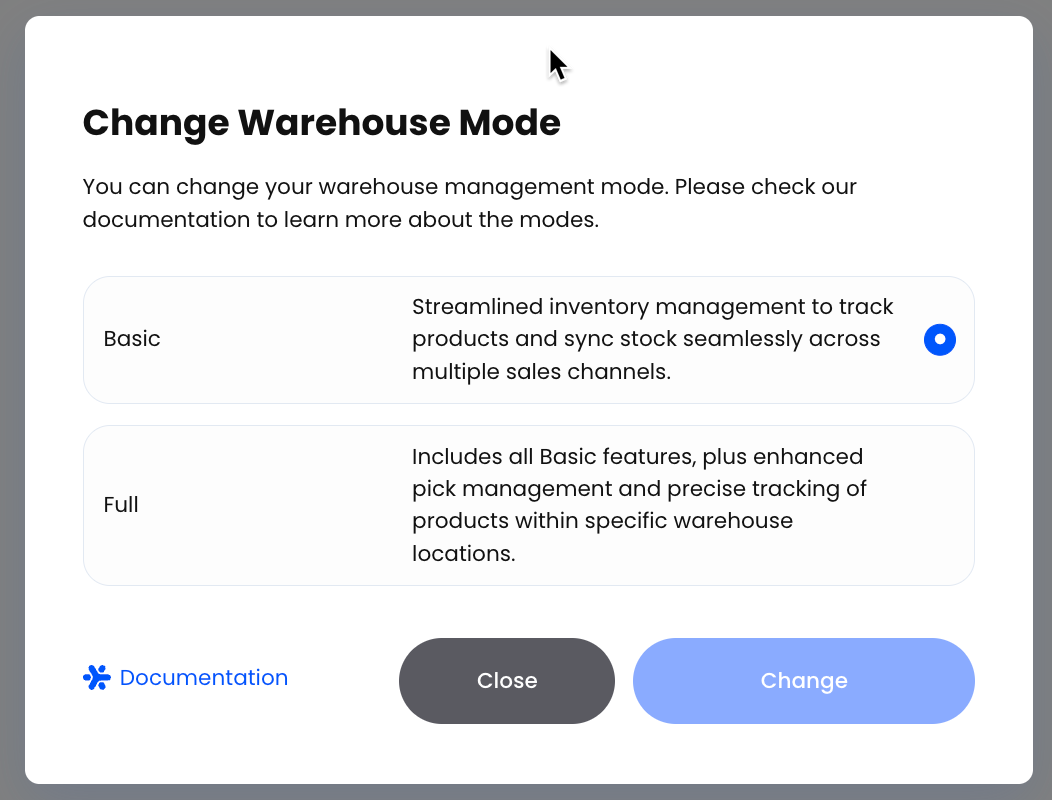
Switch modes at any time - Helm will preserve your existing data and workflows, ensuring a smooth transition between the two operational frameworks