Packing & Despatching Orders
Pack, label and despatch orders on the Helm WMS Packing Terminal, from the first scan to the printed courier label.
How Packing Works
Every order goes through the same four steps on the Packing Terminal: find the order, confirm the items, build the parcels and despatch. The terminal checks each step as you go, so a wrong item, a missing weight or an incomplete address is caught at the bench rather than by the customer.
Example: A packer scans the packing slip for order 100482: two mugs and a tea towel. They scan each item to confirm it, scan the barcode on a medium box, type 1.4 kg, and the terminal recommends a tracked 48-hour service. One press of Confirm creates the shipment, the label prints on the 6×4 printer, and the packer scans the next slip.

Before You Start
Signed in on the Packing Terminal: see Getting Started with the Packing Terminal if the bench is new.
Printers assigned: each paper size you use needs a printer in Settings > Printer. If one goes missing, the home screen shows a warning naming it.
Orders ready to pack: the order must be picked and waiting in Helm. The home screen shows how many are Ready to Pack.
The Home Screen
The home screen is where every pack starts and ends.
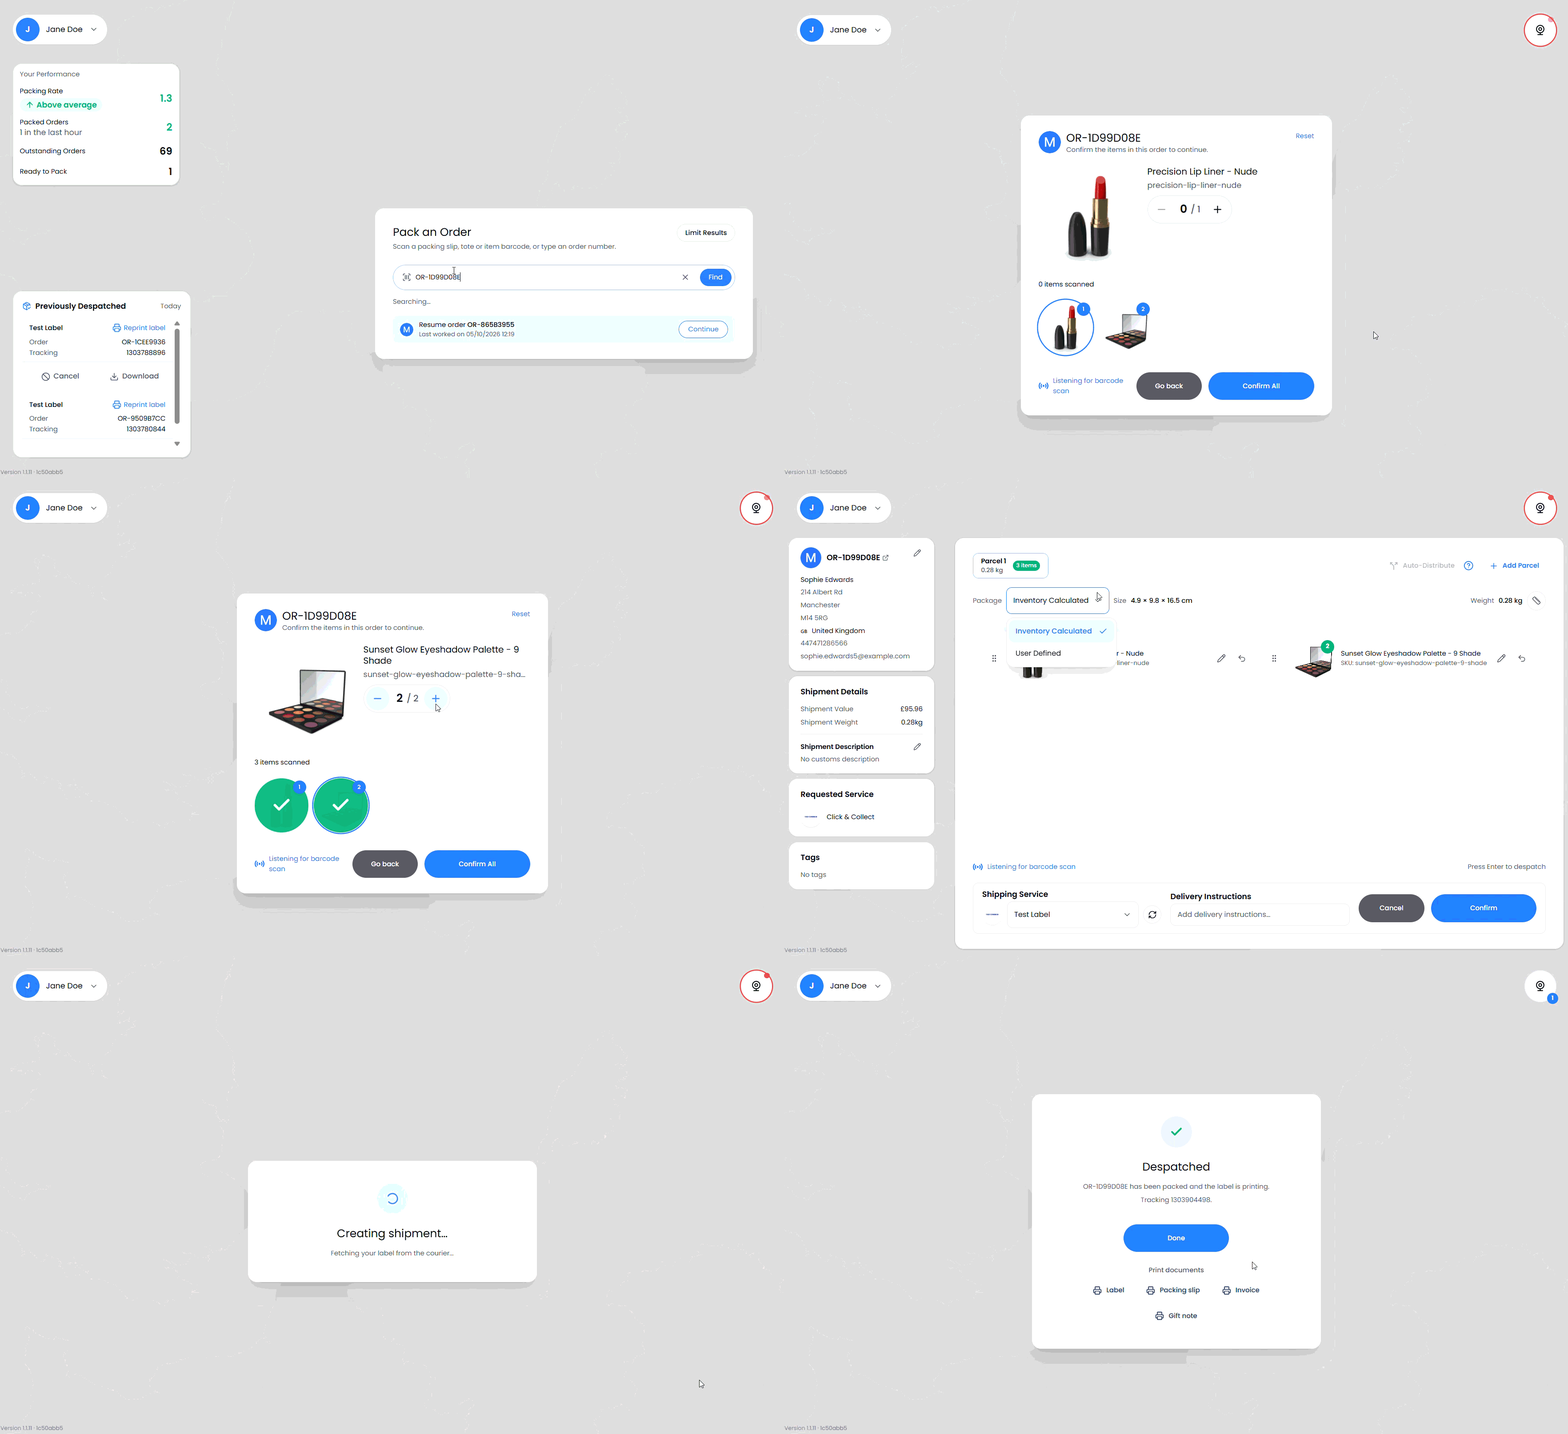
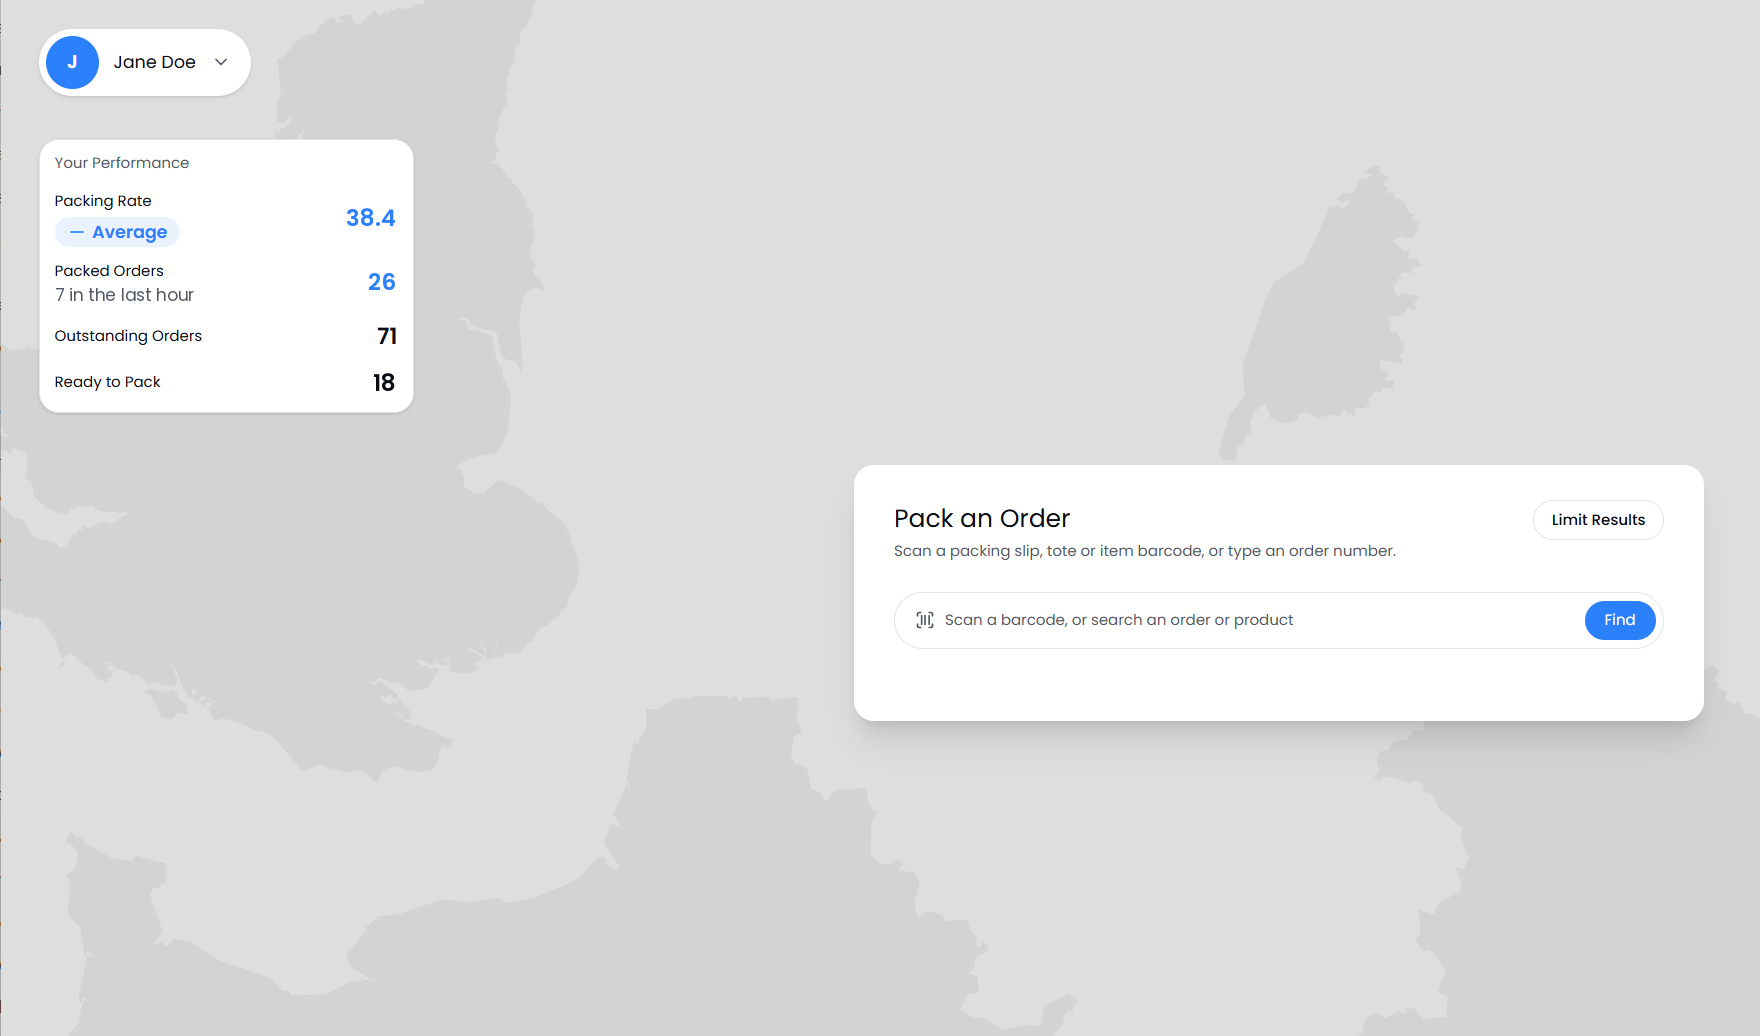
Pack an Order: the scan box. Scan a packing slip, tote or item barcode, or type an order number and select Find.
Limit Results: narrows which orders a scan or search finds, by tag, channel or folder. Useful when a bench only packs one client or one channel.
Your Performance: your Packing Rate marked Above average, Average or Below average, plus Packed Orders, Outstanding Orders and Ready to Pack.
Previously Despatched (Today): today's despatches from this bench. Select a row to reprint its label, Cancel to cancel the label and repack the order, or download the label as a PDF.
Step 1: Finding the Order
Scan the packing slip, or type the order number into Pack an Order and press Enter.
If search finds more than one match, choose the order from the list. With Allow product search on, the results are split into Orders and Products.
No slip? Scan any item from the parcel instead, or open Find Order by Items and scan everything in the parcel: the terminal finds the order that matches.
Note: In warehouses that pick into totes, scanning a tote opens it and lists its orders. Select one to pack it; orders still being picked show as Not ready to pack. When every order is packed, close the tote to return home.
Step 2: Confirming the Items
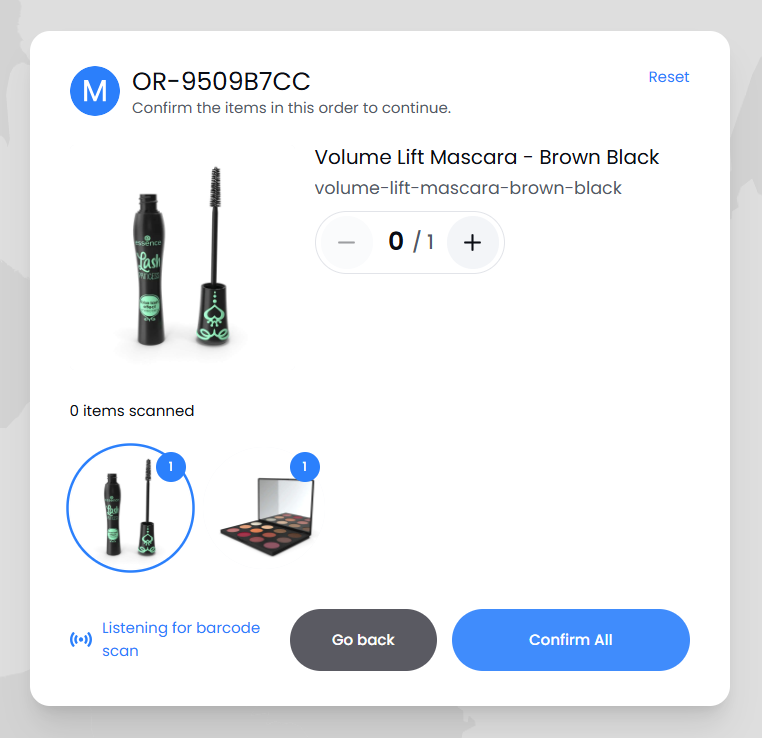
The terminal lists the items on the order and asks you to Confirm the items in this order to continue. How you confirm depends on the Product check setting.
Barcode: scan each item. Next up shows what to scan next, and the count goes up with each scan. Select Reset to start the count again.
Visual: check the items by eye, then select Confirm All.
Auto-skip: there is no check and the order opens straight on the parcel screen.
If an order has packing instructions, such as "gift wrap", they appear as a pop-up when the order opens or in the sidebar, depending on Settings. Serial-tracked products ask for their serial numbers as they are confirmed.
Heads up: Scanning more of an item than the order needs shows Too many items scanned. Take the extra item out of the parcel before choosing Continue anyway.
Note: An item that will not scan can be confirmed by a supervisor. Ask them to sign in when the terminal prompts, or scan the PROCESS barcode if your team uses one.
Step 3: Building the Parcels
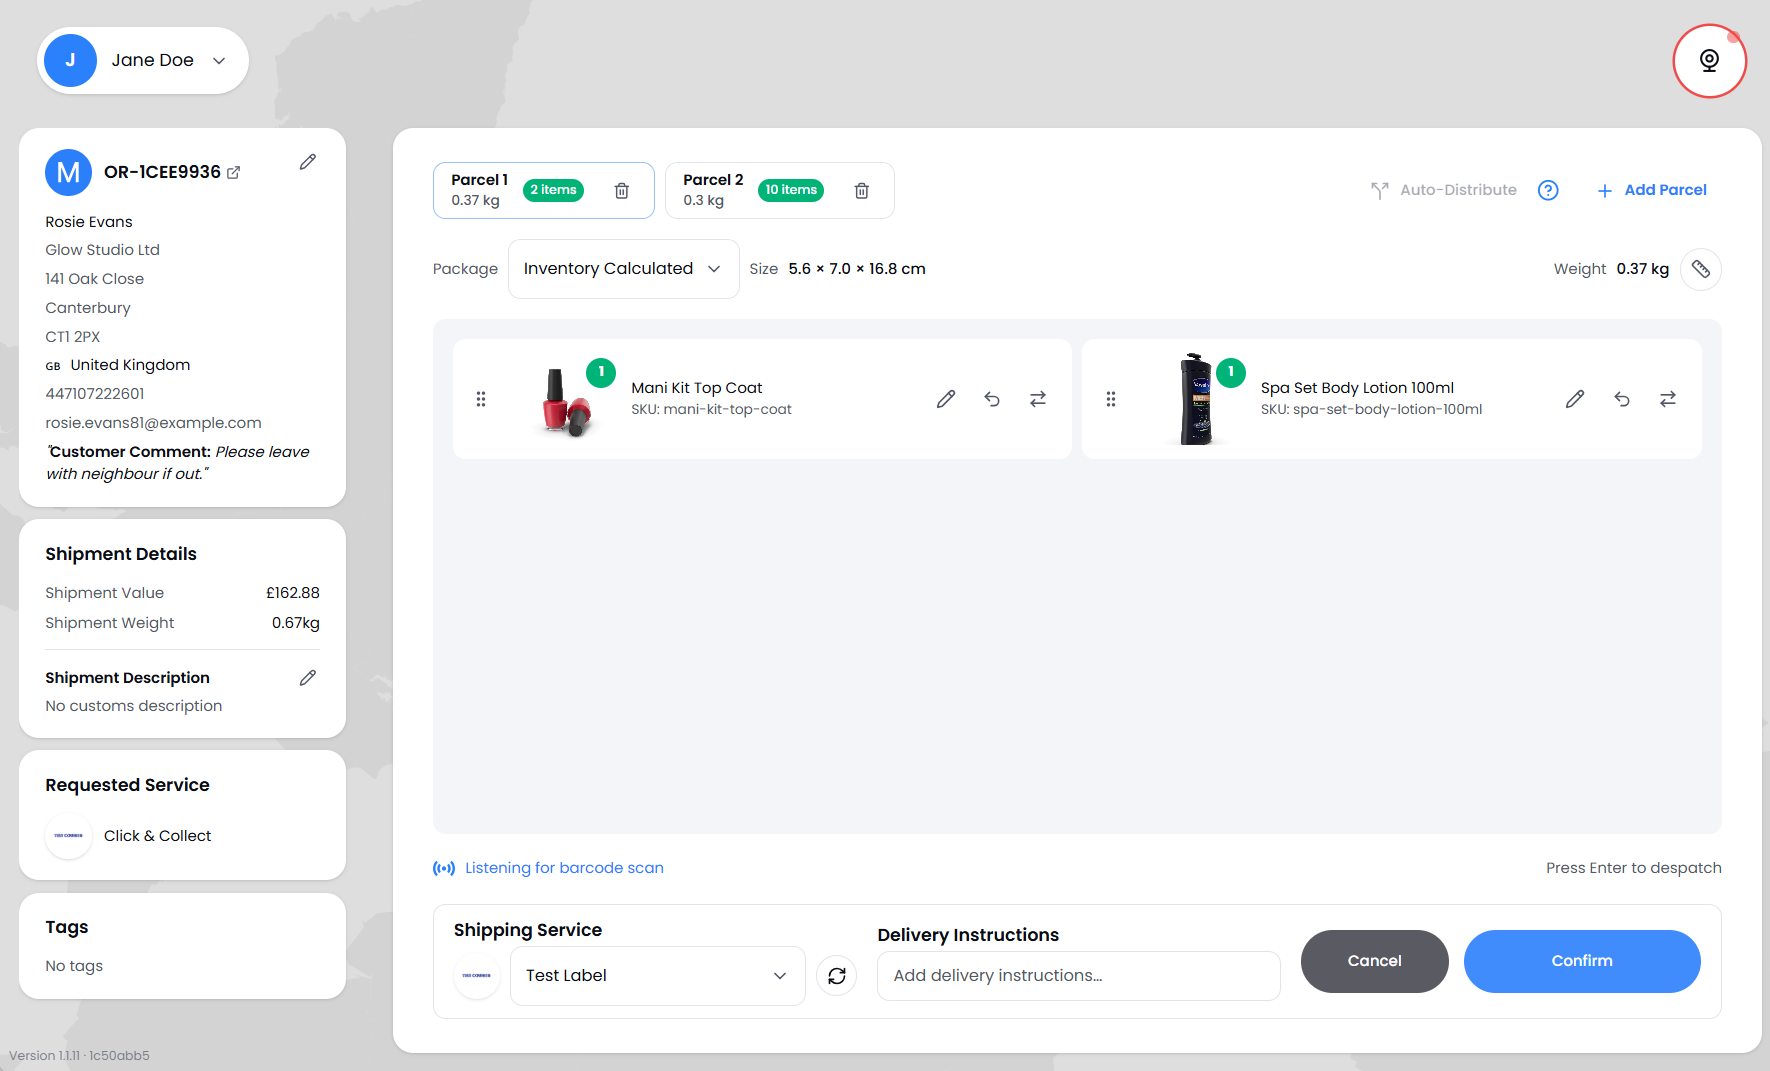
On the parcel screen, the order's items sit in a tray and each parcel has its own tab. Depending on Parcel allocation in Settings, items may already be placed in a parcel for you.
Drag each item into a parcel, or select a parcel and scan the item into it. Select Auto-Distribute to share the items out automatically.
For each parcel, choose the Package type or scan the barcode on the box. A saved package type fills in the Size for you.
Enter the Weight, and the size if you did not choose a package type. Press Tab to move between the measurement fields.
To move an item to another parcel, drag it across. Press Backspace to send the selected item back to the tray.
To change an item's customs details, such as its HS code, customs description or country of origin, select the item and press Space to open Edit Item.
The sidebar shows everything else you might need: the Customer Comment, Packaging Instructions, Shipment Details, the Requested Service, the order's Tags, any attachments to print, and the delivery address. Select the pencil beside the address to correct it.
Tip: Save your common boxes as package types with a barcode in Helm. Scanning the box is faster than typing three measurements and removes typing errors.
Step 4: Despatching the Order
Check the Shipping Service in the bar along the bottom. Helm recommends a service once the parcels are ready. Select it to change the service if your settings allow, and check any Delivery Instructions.
Look at the warning triangle beside Confirm, if one is showing. Select it to see what needs attention (see below).
Select Confirm or press Enter. If the courier confirmation screen is on, check the parcels and courier one last time and select Confirm & despatch.
The terminal shows Creating shipment… while it fetches the label from the courier, then prints it along with any documents set to print automatically.
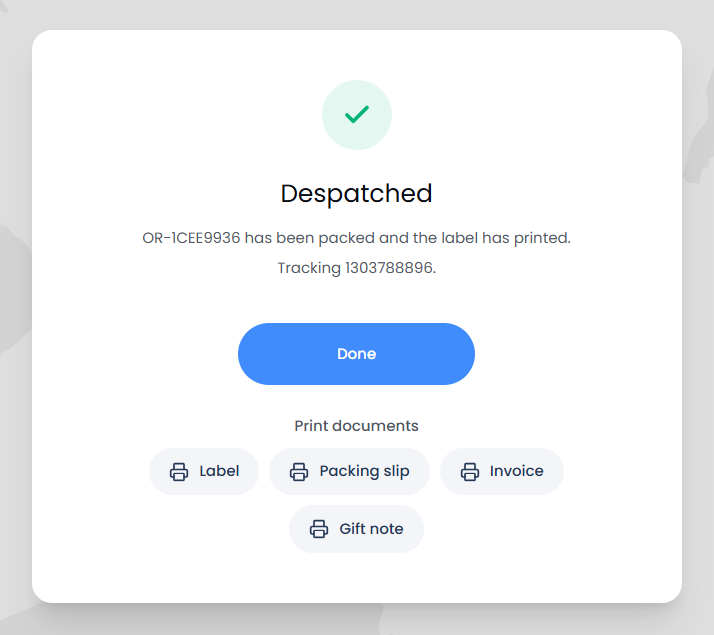
On the Despatched screen, use Print documents to reprint the Label, Packing slip or Invoice if needed, then select Done or press Enter. Or simply scan the next packing slip to go straight to the next order.
Fixing Problems Before Despatch
The terminal highlights anything that could cause a problem in amber and counts it on the warning triangle beside Confirm. Selecting the triangle opens two lists:
Fix before despatch: something that stops the order going out, such as a parcel with no size or weight when your settings require one. The triangle turns red and Confirm waits until it is fixed.
Check before despatch: things worth a second look that do not block the order, such as a parcel at 0 kg, an incomplete address, or an item going abroad without an HS code or customs description.
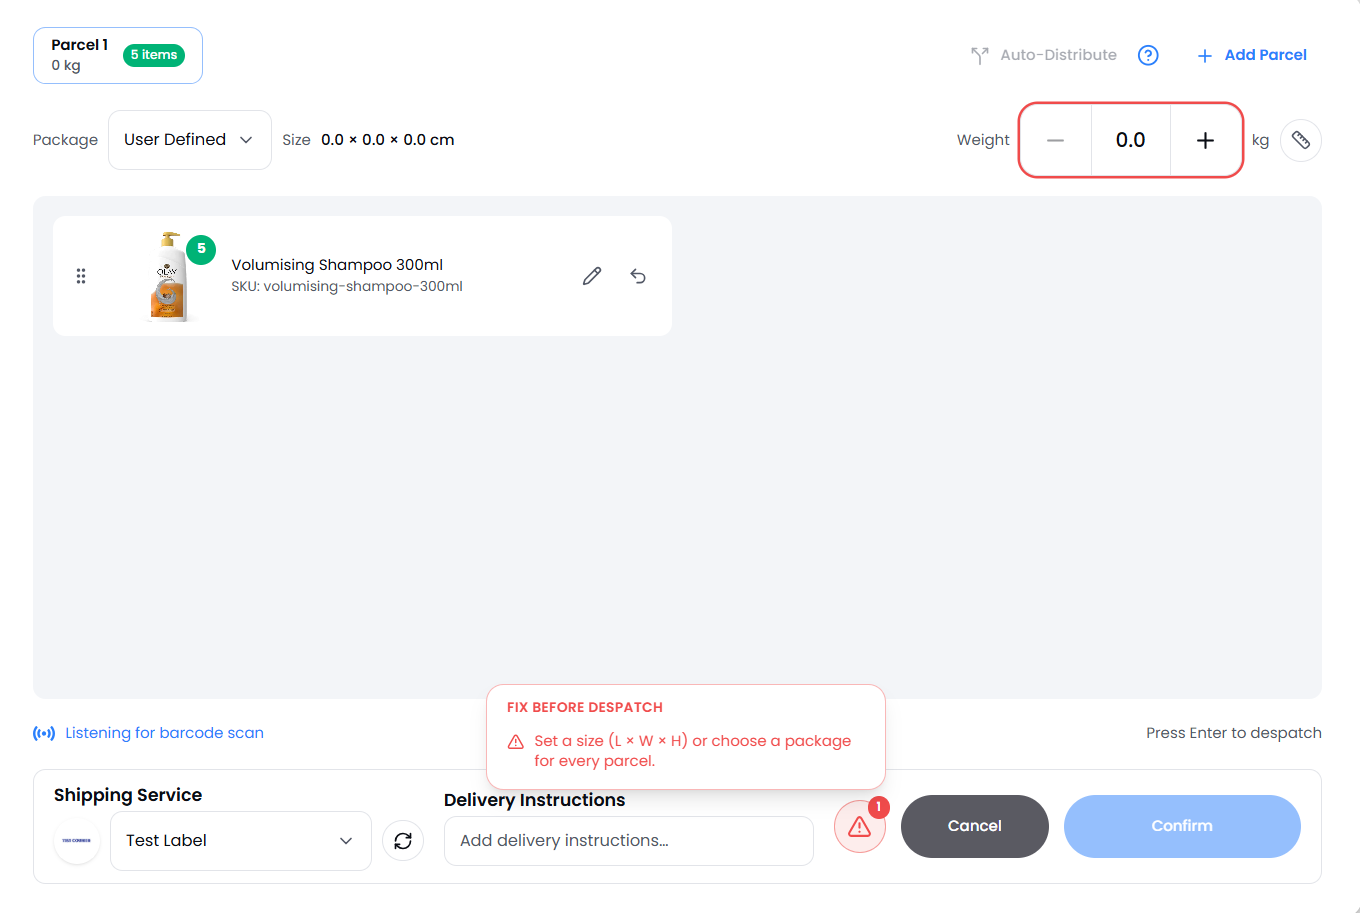
Select a line in either list to jump straight to the parcel or item it refers to.
Note: If the label does not print, the screen shows Label print failed. The shipment has already been created, so select Reprint label: it prints the same label again and never creates a second shipment.
Cancelling & Repacking an Order
On the home screen, find the order under Previously Despatched.
Select Cancel and confirm. The courier label is cancelled.
Accept the offer to repack, and the order opens ready to pack again.
If you open an order that already has a shipment, the terminal shows Order already has a shipment. Select Cancel label to cancel it and repack.
Keyboard Shortcuts
Press F1 at any time for the shortcuts on the current screen. The main ones on the parcel screen:
Best Practices
Scan Rather Than Tick
Barcode checking catches a wrong colour or size that looks right at a glance. Benches packing high-value or easily confused products get the most from it.
Let the Terminal Do the Paperwork
Turn on automatic printing for packing slips and invoices in Settings > Auto-Print, and commercial invoices for the countries that need them. Nobody has to remember which orders need which documents.
Watch the Warning Triangle
An amber warning does not stop the order, but it is usually the reason a parcel is held at customs or returned to sender. A few seconds checking it saves a failed delivery.
FAQ
Why can't I change the shipping service?
Why can't I change the shipping service?
Either the order's service is locked, or Allow shipping service change is off for this terminal. In the second case a supervisor can sign in to change it.
The label did not print. Will reprinting create a second shipment?
The label did not print. Will reprinting create a second shipment?
No. Reprint label prints the label for the shipment already created.
Can I pack an order without its packing slip?
Can I pack an order without its packing slip?
Yes. Type the order number, scan any item from it, or use Find Order by Items.
Some orders despatch without me pressing Confirm. Why?
Some orders despatch without me pressing Confirm. Why?
Auto-despatch is turned on for this terminal, for every order or for tagged orders. Check it in Settings > Process.
What happens if I am signed out halfway through an order?
What happens if I am signed out halfway through an order?
The half-packed order has to be started again. Nothing is despatched until you confirm it.
Stuck on an order? Contact the Helm support team with the order number and a photo of the screen.
Was this helpful?
Still need help? Share an idea