Voila Connection
Voila is the shipping platform behind your courier bookings and labels in Helm WMS. Helm is already connected to it, so most businesses never need this setting; this article shows how to connect your own Voila account if you have one.
What Voila Connection Does
When you book a shipment and print a label in Helm, the request goes through Voila, the shipping platform that talks to your couriers. Helm is connected to Voila for you, so there is nothing to set up here before you start shipping.
The setting is for businesses that already run their own Voila account. Connecting it lets Helm book shipments through that account, so the courier accounts, services and rules you have built in Voila carry on working with your Helm orders.
Example: a retailer has used Voila on its own for years, with courier rules that split large orders across two couriers. When it moves its warehouse onto Helm, the admin connects the existing Voila account with its API account and token, so Helm's shipments use the same couriers and rules as before.

Before You Start
Where to find it: go to Settings > Despatch Settings > Voila Connection. It opens the Voila API Account window rather than a separate page.
Most businesses can leave it as it is: the window confirms that no setup is needed because Helm is already connected to Voila.
To use your own account, have your details to hand: your Voila API account and API token. You find the token in your Voila account settings.
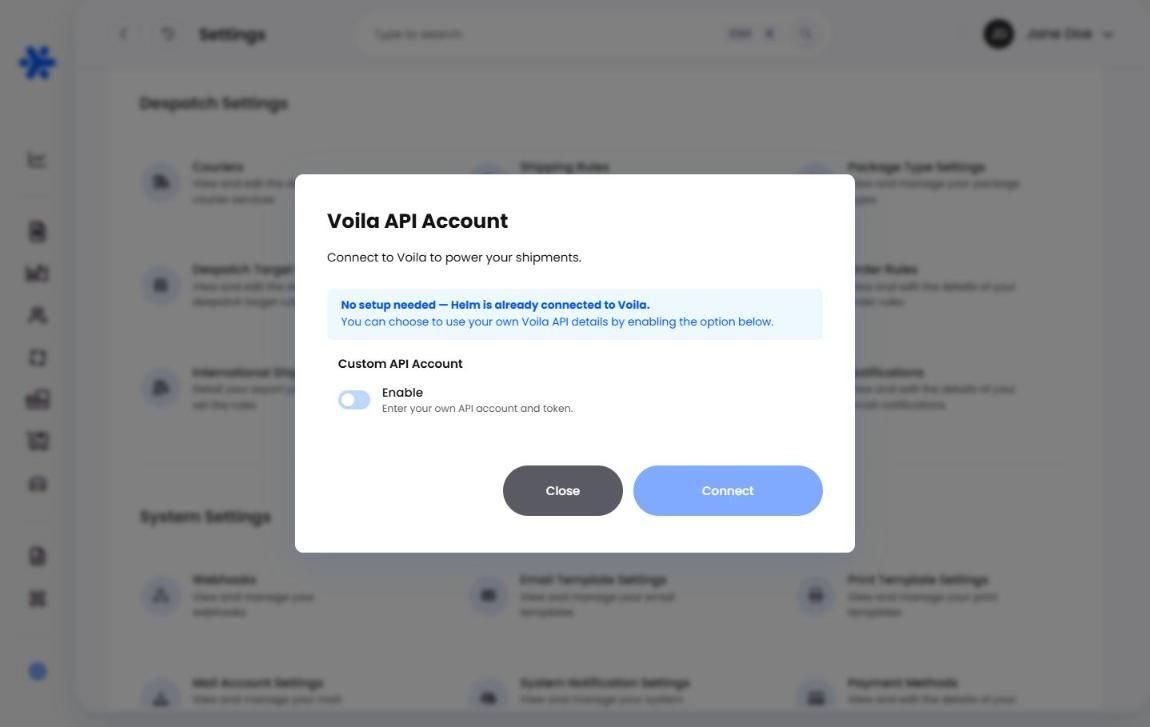

How to Connect Your Own Voila Account in Helm
Go to Settings and, under Despatch Settings, choose Voila Connection.
Under Custom API Account, switch on Enable. The API account and API token fields appear.
Enter your API account.
Enter your API token. Hover the info icon beside it for a reminder of where to find it.
Click Connect.
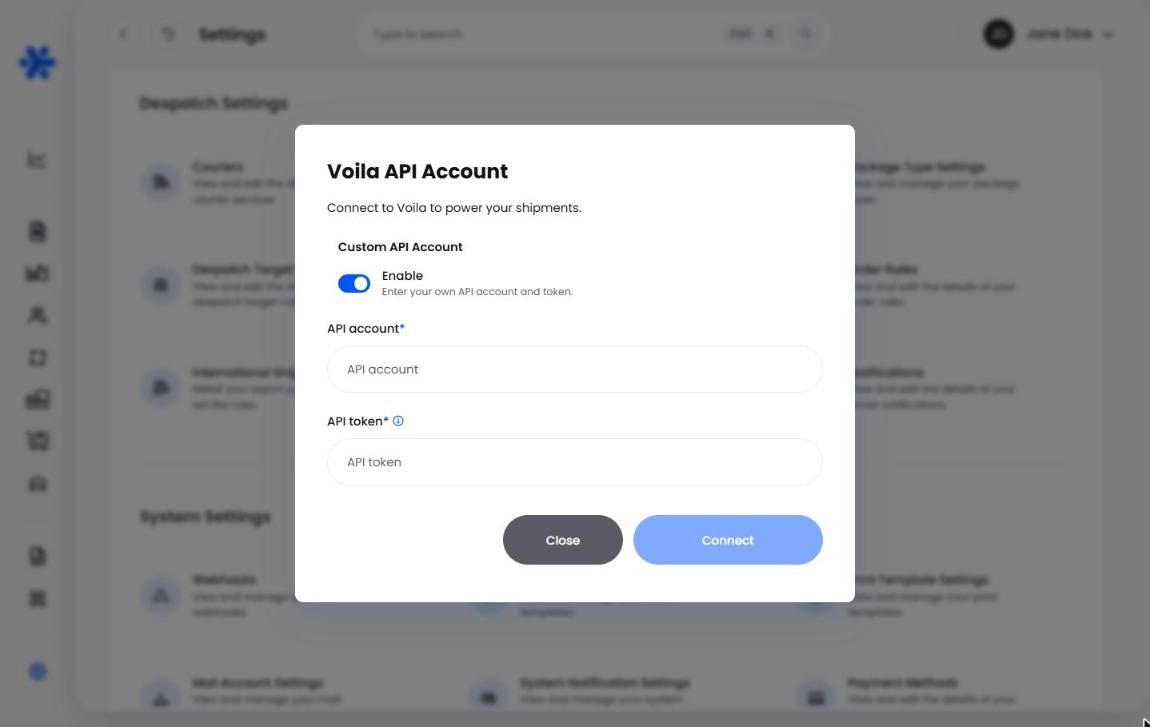
Heads up: once you connect your own account, Helm books shipments through it instead of Helm's own connection. Check your couriers straight afterwards, before you despatch any orders.

After You Connect
The courier accounts and services from your Voila account come into Helm. Open Couriers under Settings > Despatch Settings and check that each courier you use is there, with the details and services you expect.
Then check your Shipping Rules, because each rule chooses from the courier services Helm holds. A rule pointing at a service that is no longer there cannot assign it.

Best Practices & Notes
Leave It Off Unless You Use Voila Directly
Helm's own connection is ready to use and needs no upkeep. Only connect your own account if your business already manages couriers or rules in Voila and wants Helm to use them.
Treat the API Token Like a Password
Anyone with the token can book shipments on your Voila account. Keep it with the person setting up the connection, and do not share it in emails or chat.
Test One Order Before Your Busy Period
After connecting, despatch a single order and check that the label prints and the right courier service is used before you put your full volume through.

FAQ
Do I need to set anything up here to start shipping?
Do I need to set anything up here to start shipping?
No. Helm is already connected to Voila, so you can link your couriers and start despatching without opening this setting.
Where do I find my API account and token?
Where do I find my API account and token?
In your Voila account settings. The info icon next to API token in the window gives the same reminder.
What happens to my couriers when I connect my own account?
What happens to my couriers when I connect my own account?
The courier accounts and services from your Voila account come into Helm. Check them under Settings > Despatch Settings > Couriers before you despatch.

If you are still stuck, contact Helm Support.
Was this helpful?
Still need help? Share an idea