Packing Terminal Settings
Set up printers, Packeye, packing rules and returns put-away on each Helm WMS Packing Terminal.
Opening Settings
Settings are saved on the terminal itself, not against the person signed in. Each packing bench keeps its own printers, packing rules and returns setup, so a bench by the courier collection point can work differently from one in the returns area.
Select your name in the top-left corner to open the user menu.
Choose Settings. The panes are listed down the left under three groups: General Settings, Despatch Settings and Returns Settings.
Make your changes in as many panes as you need, then select Save. A Changes Saved message confirms it.
To leave without saving, select Cancel. If anything changed, the terminal asks Close without saving?: choose Discard changes or Keep editing.
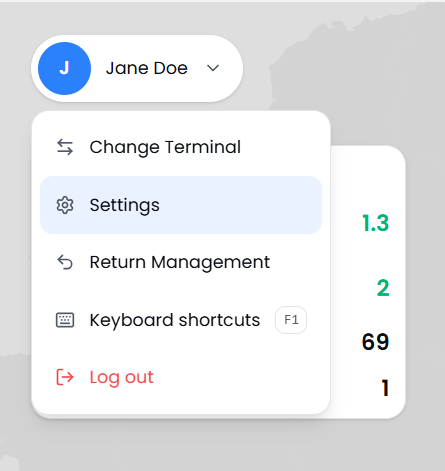
Note: Settings only appears in the user menu while Supervisor Mode is on. Owners and admins see it straight away. Anyone else turns on Supervisor Mode in the same menu and a supervisor signs in.
Tip: Settings that need more explaining have a short link underneath them, such as What Packeye is. Select it for a plain-English explanation without leaving the pane.
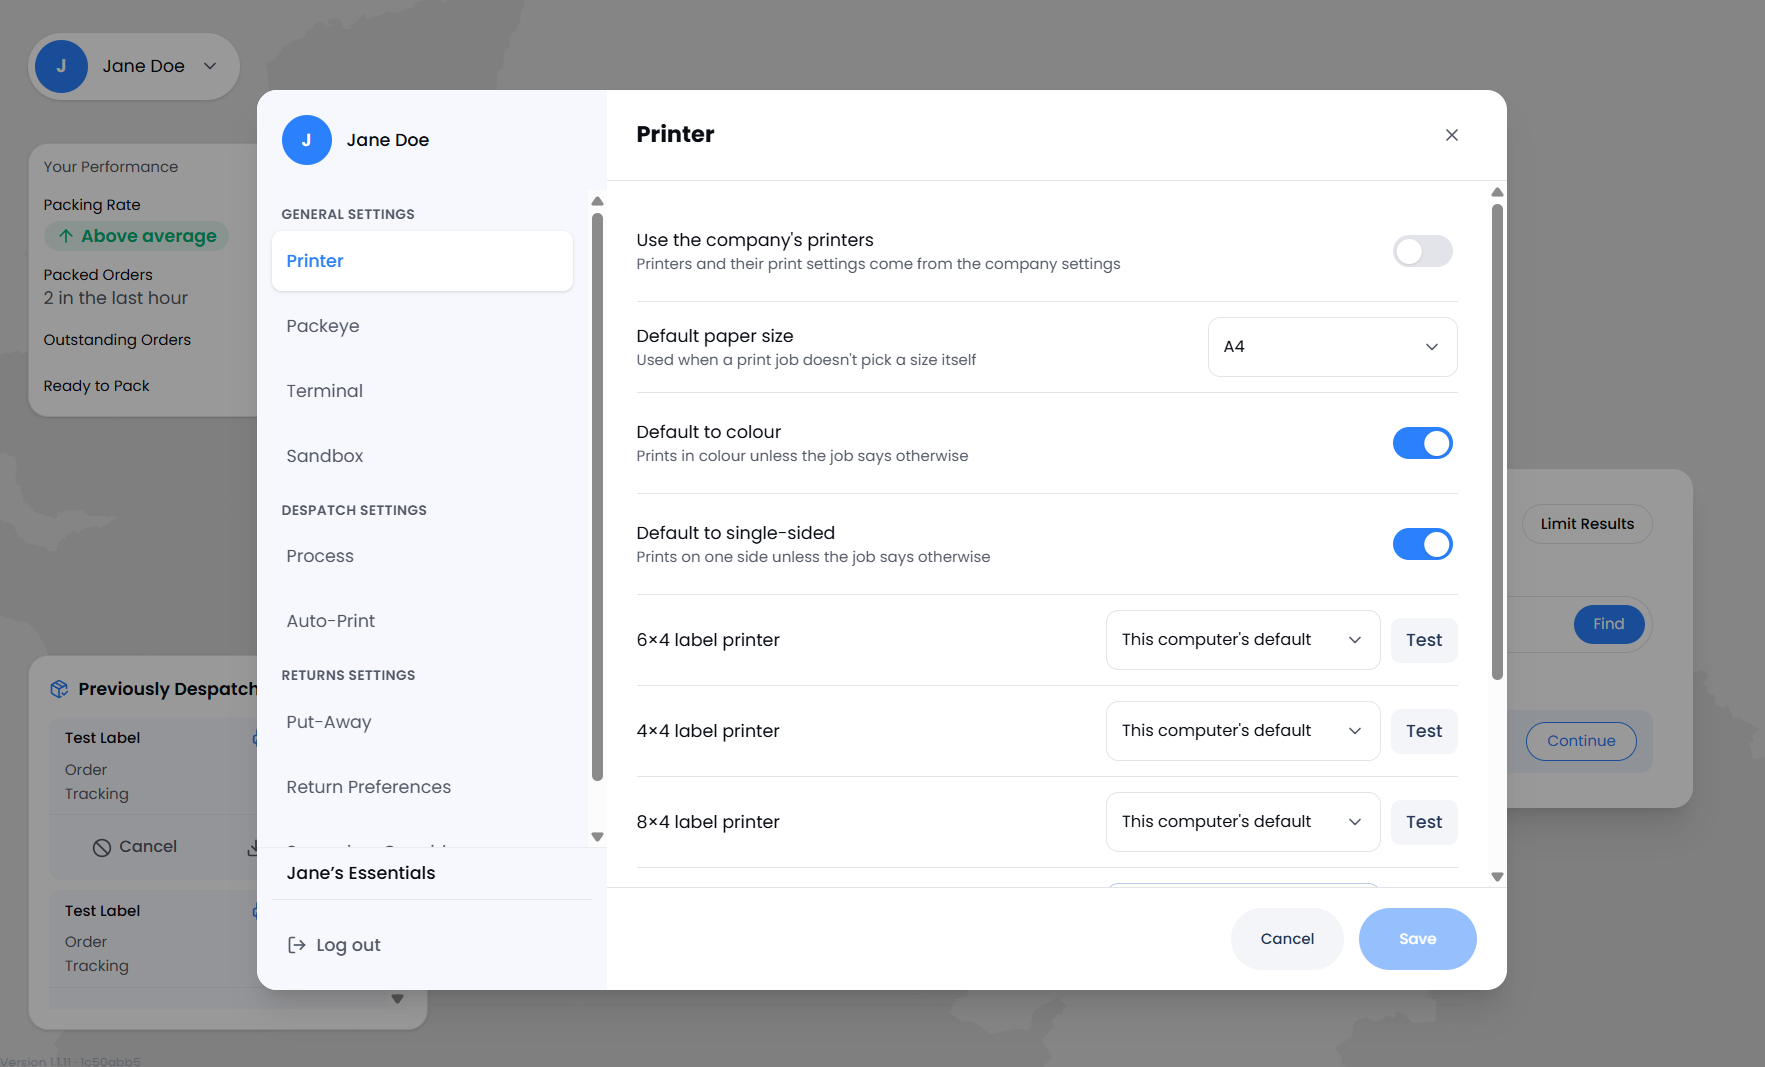

Printer
Every document the terminal prints, from courier labels to packing slips, goes to the printer assigned to its paper size. Set this pane up first: until a printer is assigned, labels have nowhere to go and the home screen shows a printer warning.
Note: You can open this pane before anyone signs in. Right-click the Packing Terminal icon in the system tray and choose Printer Settings, or select Printer settings on the Choose your terminal screen.
Tip: Helm can print to this bench too. While the terminal is running and signed in, documents and labels sent to it from Helm print on the printer matched to their size.
Packeye
Packeye films the bench with a webcam while an order is packed and saves the video against that order. If a customer says an item was missing or damaged, the video shows exactly what went in the box. It films the bench, not the packer.
Tip: Stop when nothing moves keeps videos short on quick packs without cutting off a slow one. 30 seconds suits most benches.
What Packeye Needs
A webcam: any standard webcam connected to the computer that runs the Packing Terminal. There is no minimum resolution or frame rate; the computer only needs to recognise the camera so you can choose it under Camera.
Free disk space: videos are saved to the folder in Save videos to first, then sent to your company's storage.
An internet connection: so each finished video can be uploaded and saved against its order.
Tip: Mount the camera above the bench, pointing down, so it sees the whole packing area and every item going into the box.
Terminal
Heads up: If auto-logout signs someone out partway through an order, that order has to be started again. Choose a time longer than your slowest packs.
Sandbox
Sandbox (practice mode) adds a Sandbox switch to the top bar. Nothing changes until someone turns that switch on. While it is on, an orange border runs round the screen, nothing reaches the live system, orders and despatches are practice only, and labels print as test pages. It switches itself off when the user logs out.
Tip: Turn Sandbox on for a new packer's first shift. They can work through real-looking orders without creating a single shipment.
Process
The Process pane under Despatch controls how an order moves through the bench, from checking items to the final despatch.
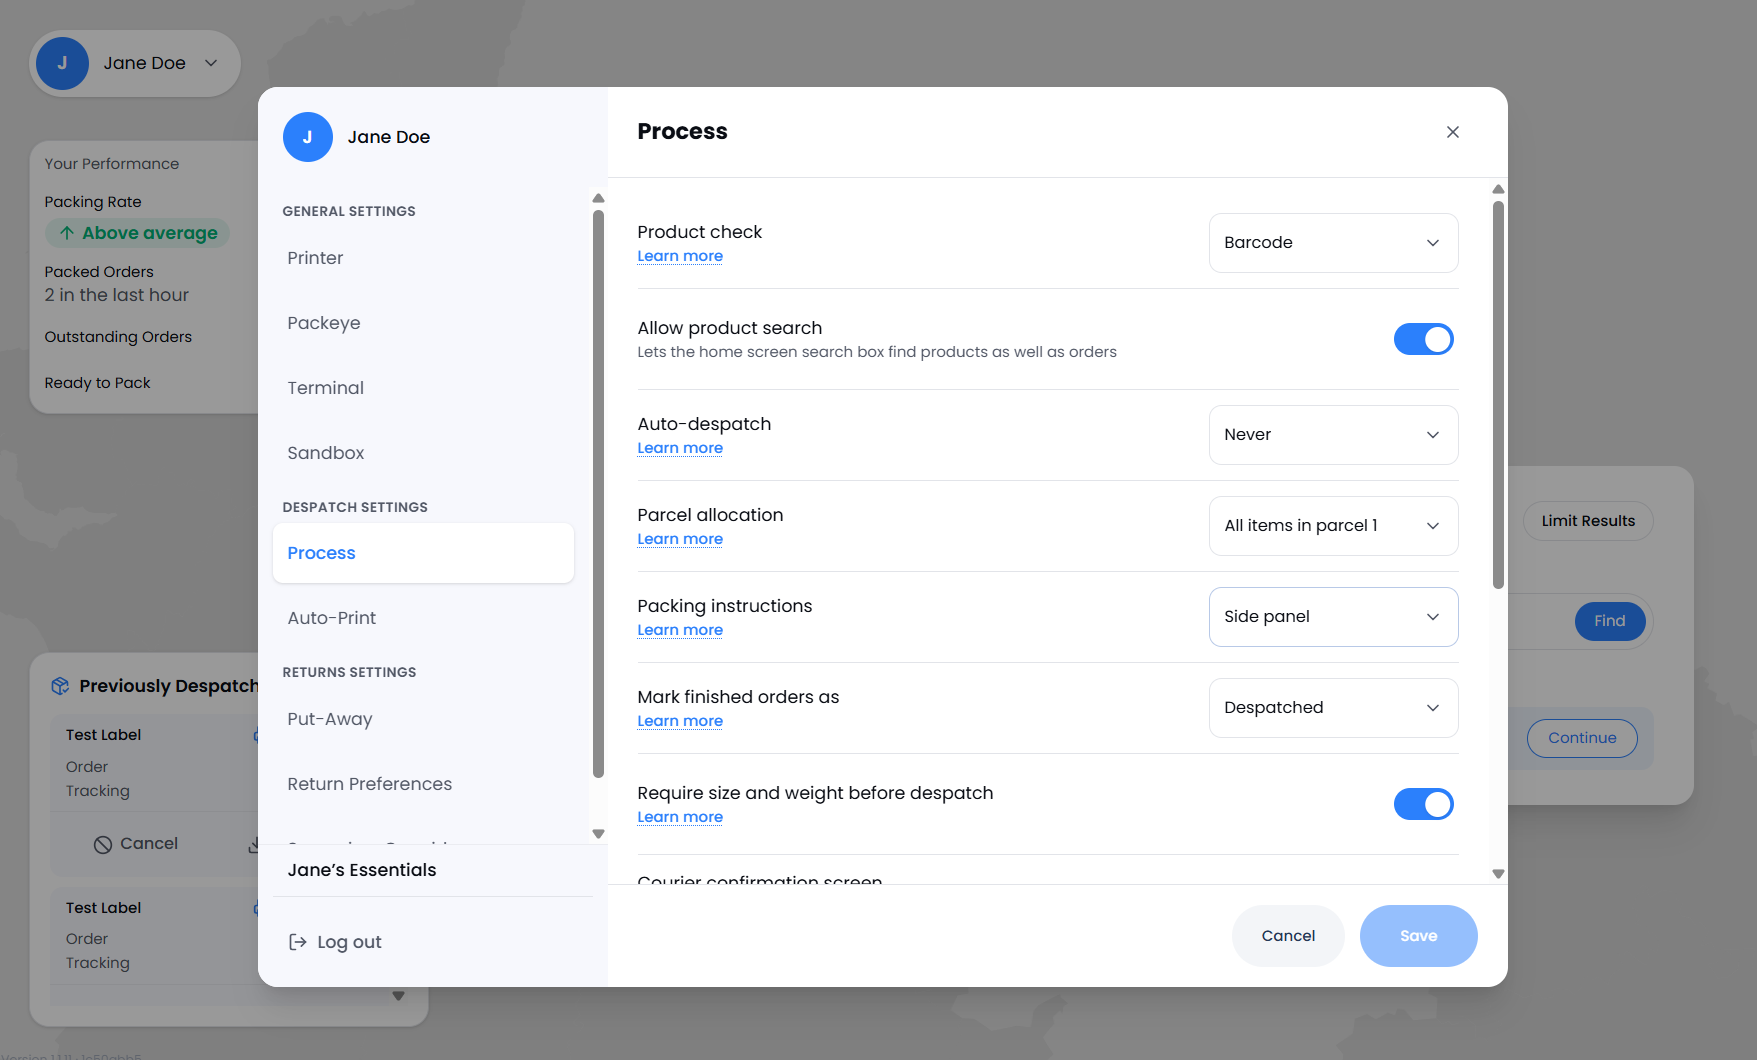
Heads up: With Auto-despatch set to Every order, no packer confirms anything before the label is created. Use tags to limit it to orders you trust, such as single-item orders in a standard box.
Note: Only choose Packing under Mark finished orders as if something else in your process marks those orders as despatched later.
Auto-Print
Put-Away
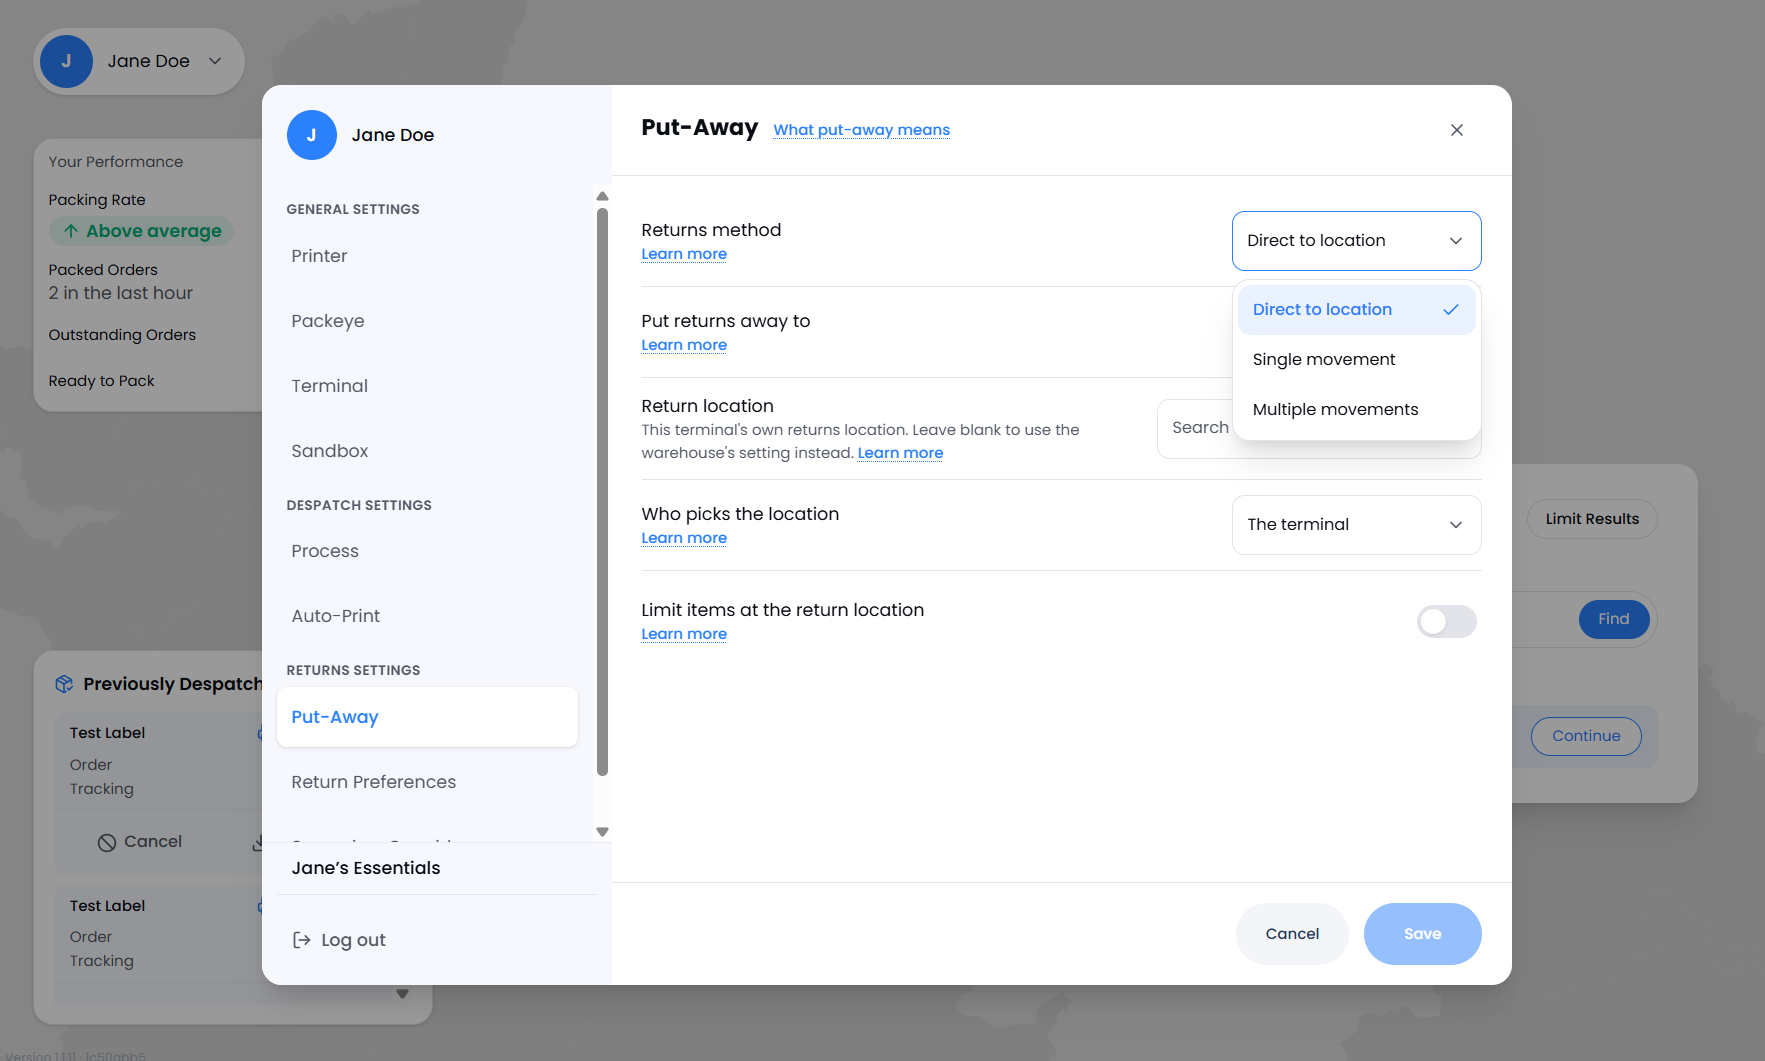
Put-away is what happens to returned goods after they are booked in: where they go and how they get there. Choose a Returns method first, and the settings that belong to it appear underneath.
Note: The Put-Away pane only appears for warehouses that use locations. In a basic stock warehouse, returns are completed straight after inspection with no put-away step.
Return Preferences
Supervisor Override
Supervisor mode makes everyone using this terminal count as a supervisor, so late returns are accepted without a supervisor signing in. Leave it off, the normal setting, to keep the sign-in for late returns.
Warning: Only turn on Supervisor mode on a terminal that only supervisors can reach. Anyone at that bench can then accept a late return.
Copying Settings to Another Terminal
Once one bench is set up the way you want, copy it rather than setting up the next one by hand.
On the finished terminal, open Settings and under Transfer settings select Export…. Save the file somewhere the other computer can reach.
On the new terminal, open Settings and select Import….
At Import settings?, select Choose file and import and pick the file. A Settings imported. message confirms it.
Check the Printer pane. The printers on a new bench often have different names, so reassign any that do not match.
Resetting a Terminal
A factory reset puts every setting back to its default, deletes the saved sign-in details and signs you out. Orders and shipments already sent are not affected.
Open Settings and, under Factory reset, select Reset this terminal.
At Reset this terminal to factory settings?, select Continue.
Select Reset terminal now to confirm.
Sign in again with Log in with browser. The PIN keypad returns after that first browser sign-in.
Warning: A factory reset cannot be undone. Export the settings first if there is any chance you will want them back.
FAQ
Why can't I see Settings in the user menu?
Why can't I see Settings in the user menu?
Do my settings follow me to another bench?
Do my settings follow me to another bench?
No. Settings are saved on each terminal. Use Export… and Import… under Transfer settings to copy them across.
How do I check which company this terminal belongs to?
How do I check which company this terminal belongs to?
Open Settings. The company name is shown at the bottom of the sidebar.
Why is there no Put-Away pane?
Why is there no Put-Away pane?
Your warehouse does not use locations, so there is nothing to put away to. Returns are completed straight after inspection.
I changed a setting and nothing happened. Why?
I changed a setting and nothing happened. Why?
Check you selected Save before closing the window and saw the Changes Saved message. Settings that depend on another one, such as Log out after, only appear once the setting above them is on.
Still not sure which setting you need? Contact the Helm support team with a screenshot of the pane you are working in.
Was this helpful?
Still need help? Share an idea