Processing Returns with the Returns Terminal
Find a returned order, record what came back and why, and put the stock away on the Helm WMS Packing Terminal.
How Returns Work
The Returns Terminal books a customer return back into Helm in three steps: find the original order, inspect what came back, and put the stock away. Each item gets a reason and is marked as restockable or not, so good stock goes back on sale quickly and your return reasons build a clear picture over time.
Example: A parcel arrives for order 100482. The operator scans the order number from the returns slip, confirms it is the right order, and scans the one mug that came back. They set the reason to "Changed mind", leave it as restockable, scan shelf A-03-2 and select Complete return. The mug is back in stock and available to sell.

Before You Start
Signed in on the Returns Terminal: choose Returns Terminal on Choose your terminal, or select Return Management in the user menu from the home screen.
Put-away set up: if your warehouse uses locations, choose a returns method in Settings > Put-Away first. In a basic stock warehouse there is no put-away step.
A printer for item labels (optional): needed if you want to print a barcode label for an item during inspection.
Step 1: Finding the Order
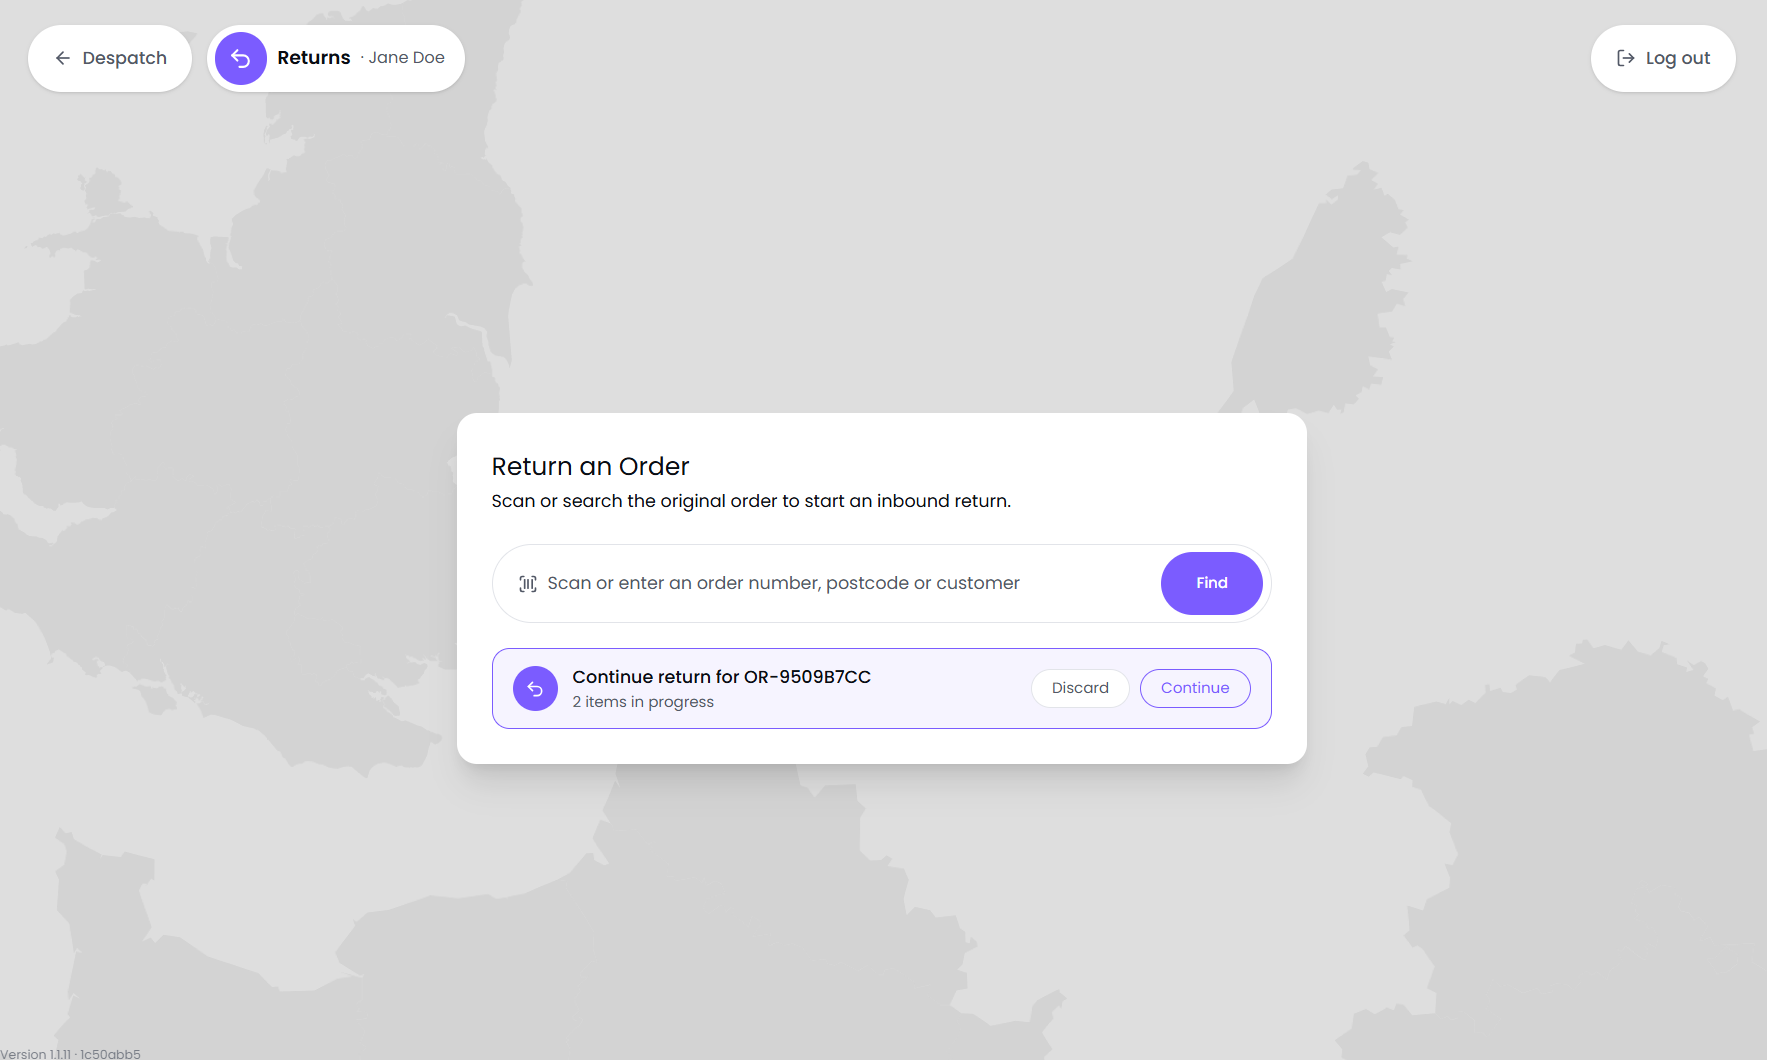
Under Return an Order, scan or enter the order number, postcode or customer name.
If more than one order matches, choose the right one under Matching orders.
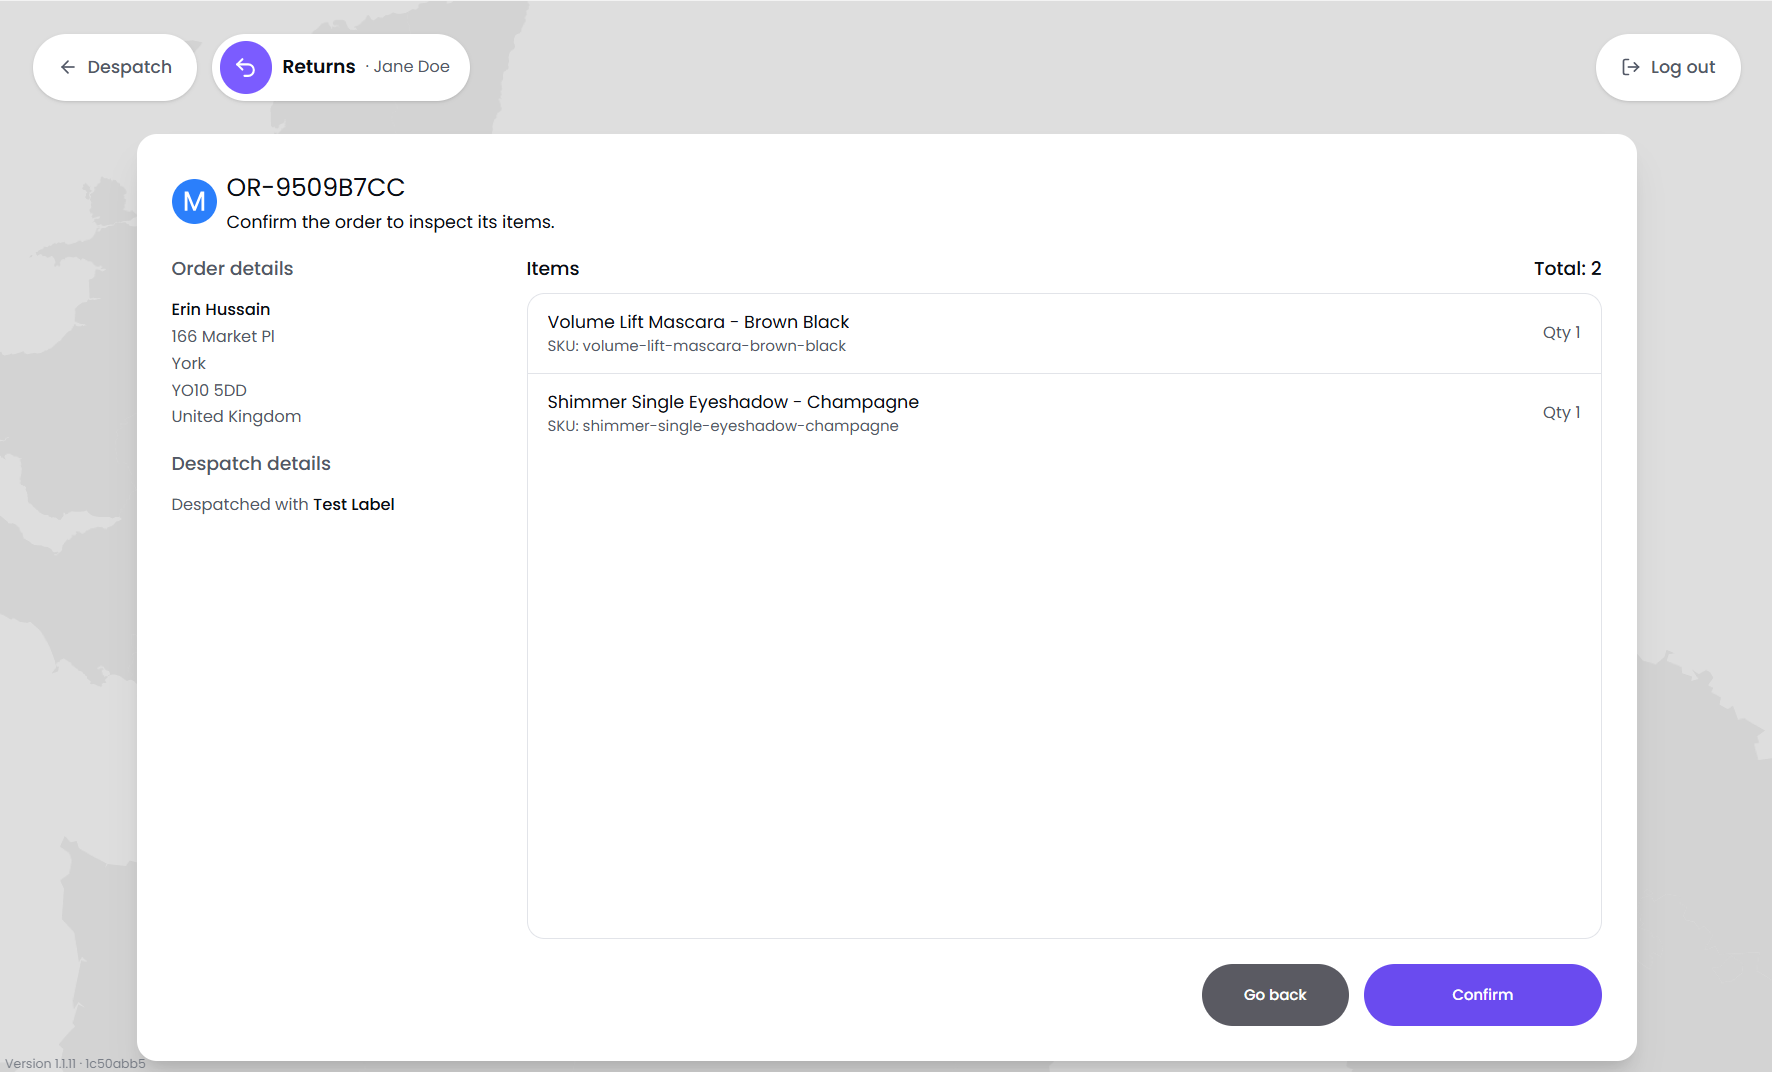
Check the Order details, Despatch details and Items, including how long ago the order was delivered and which service it went out with.
Select Confirm to inspect its items, or Go back if it is the wrong order.
Note: A return older than the limit set under Supervisor needed after shows This return is older than the supervisor threshold. A supervisor must sign in to unlock it before you can continue.
Note: If a return was left part-way, Return an Order shows Continue return for that order. Select Continue to pick up where you left off, or Discard to start again.
Step 2: Inspecting the Items
The Order Items table lists every item on the order with the quantity Ordered. For each item that came back:
Scan the item to count it. Each scan adds one to Return qty. With visual checking you can also set the quantity on screen.
Choose a Reason. To give every selected item the same reason, use Reason for all items.
Check Restock. Leave it on for items fit to sell again; turn it off for anything damaged or unsellable.
For a batch or serial tracked item with Restock on, enter its batch or serial number. This applies to full stock warehouses only. Matching ignores capitals, so an existing number is reused and a new one is created, and the return cannot go ahead until the number is entered. Serial tracked items are returned one per line.
Under Photos / note / label, take a photo, add a note or print a barcode label for the item if needed. Some reasons ask for a photo before the return can be completed.
Select Continue to move to put-away. In a basic stock warehouse the button reads Complete return and finishes the return here.
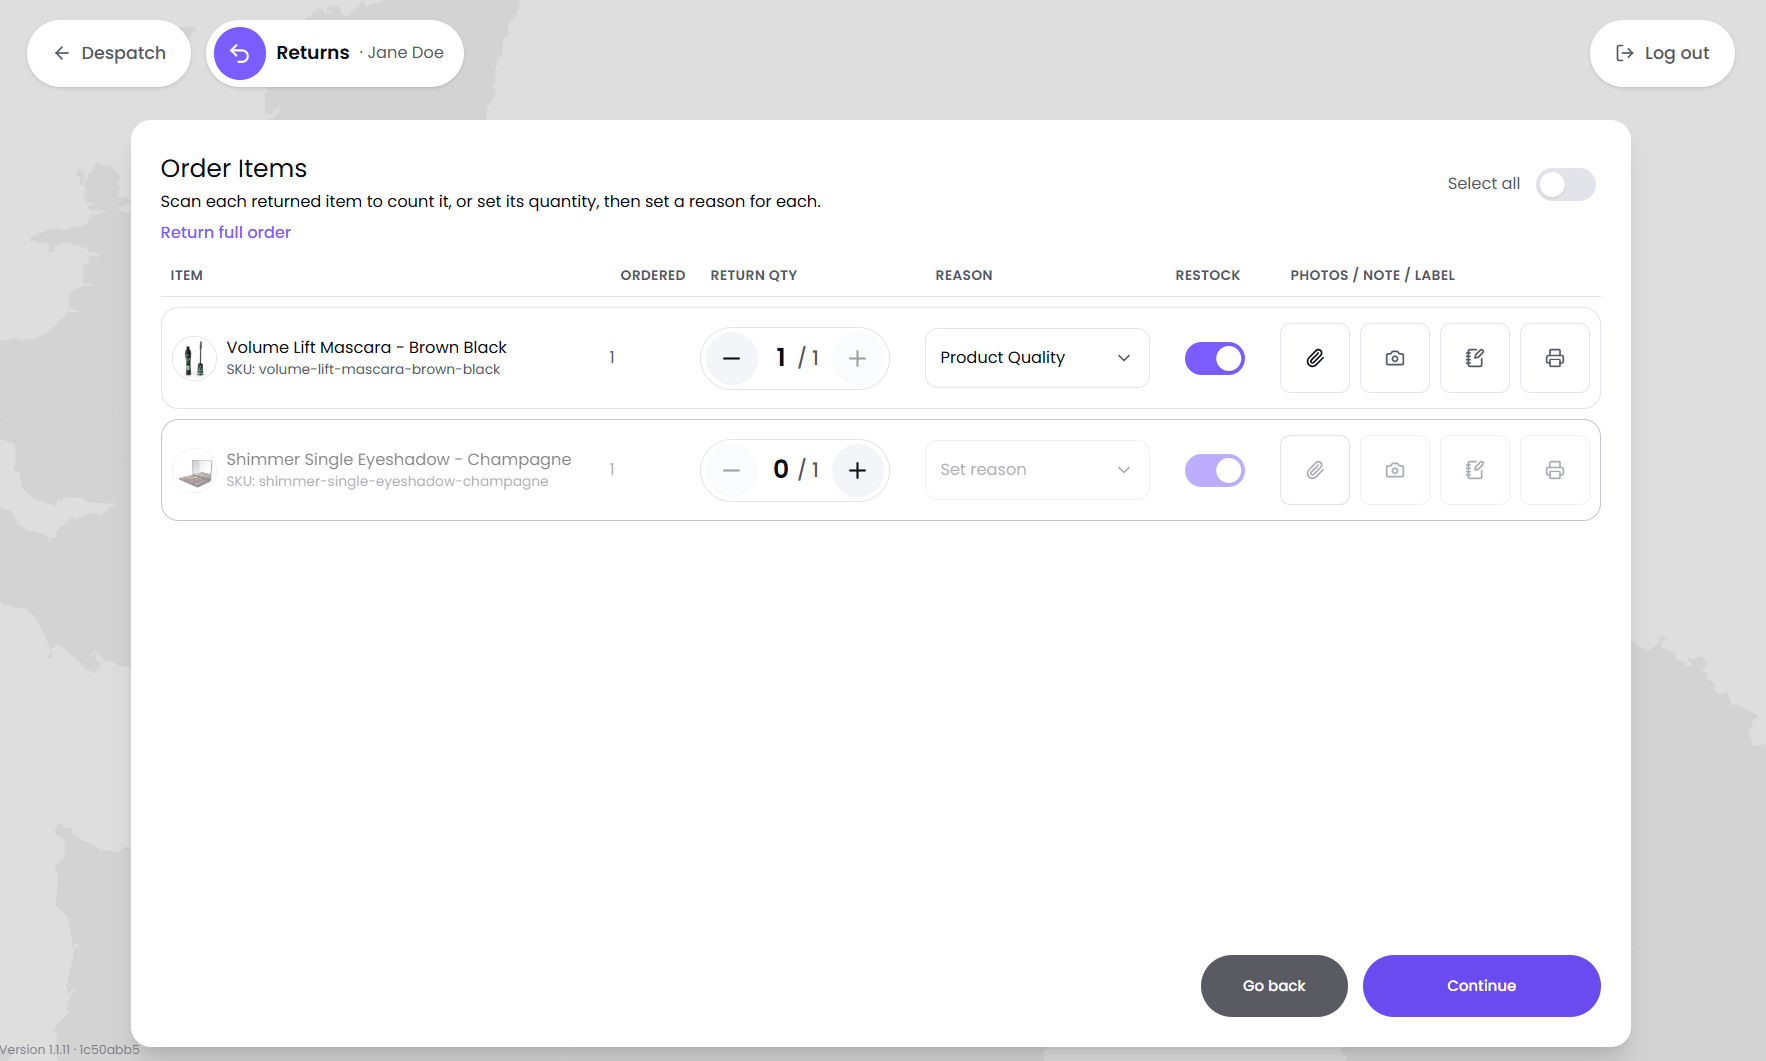
Tip: When a whole order comes back, select Return full order, or turn on Select all and use Reason for all items and Note and photos for the full order instead of filling in each line.
Note: When items are checked by barcode scan and a barcode is missing or damaged, a supervisor can sign in to count items by hand. The terminal records who did.
Printing an Item Label
Choose Print item label on an item to print its barcode label, for example when the original label is torn. The dialog shows the progress: In queue, Printing… and Printed. If printing fails, select Change printer to try another printer or Download label to save it as a PDF.
Step 3: Putting the Stock Away
What you see here depends on the Returns method chosen in Settings.
Direct to location: each item is put on a shelf there and then. The terminal may suggest a location; scan the location you use, or Pick location to choose one.
Single movement or Multiple movements: items go to a collection point, and Helm raises a movement job for the put-away team to finish later.
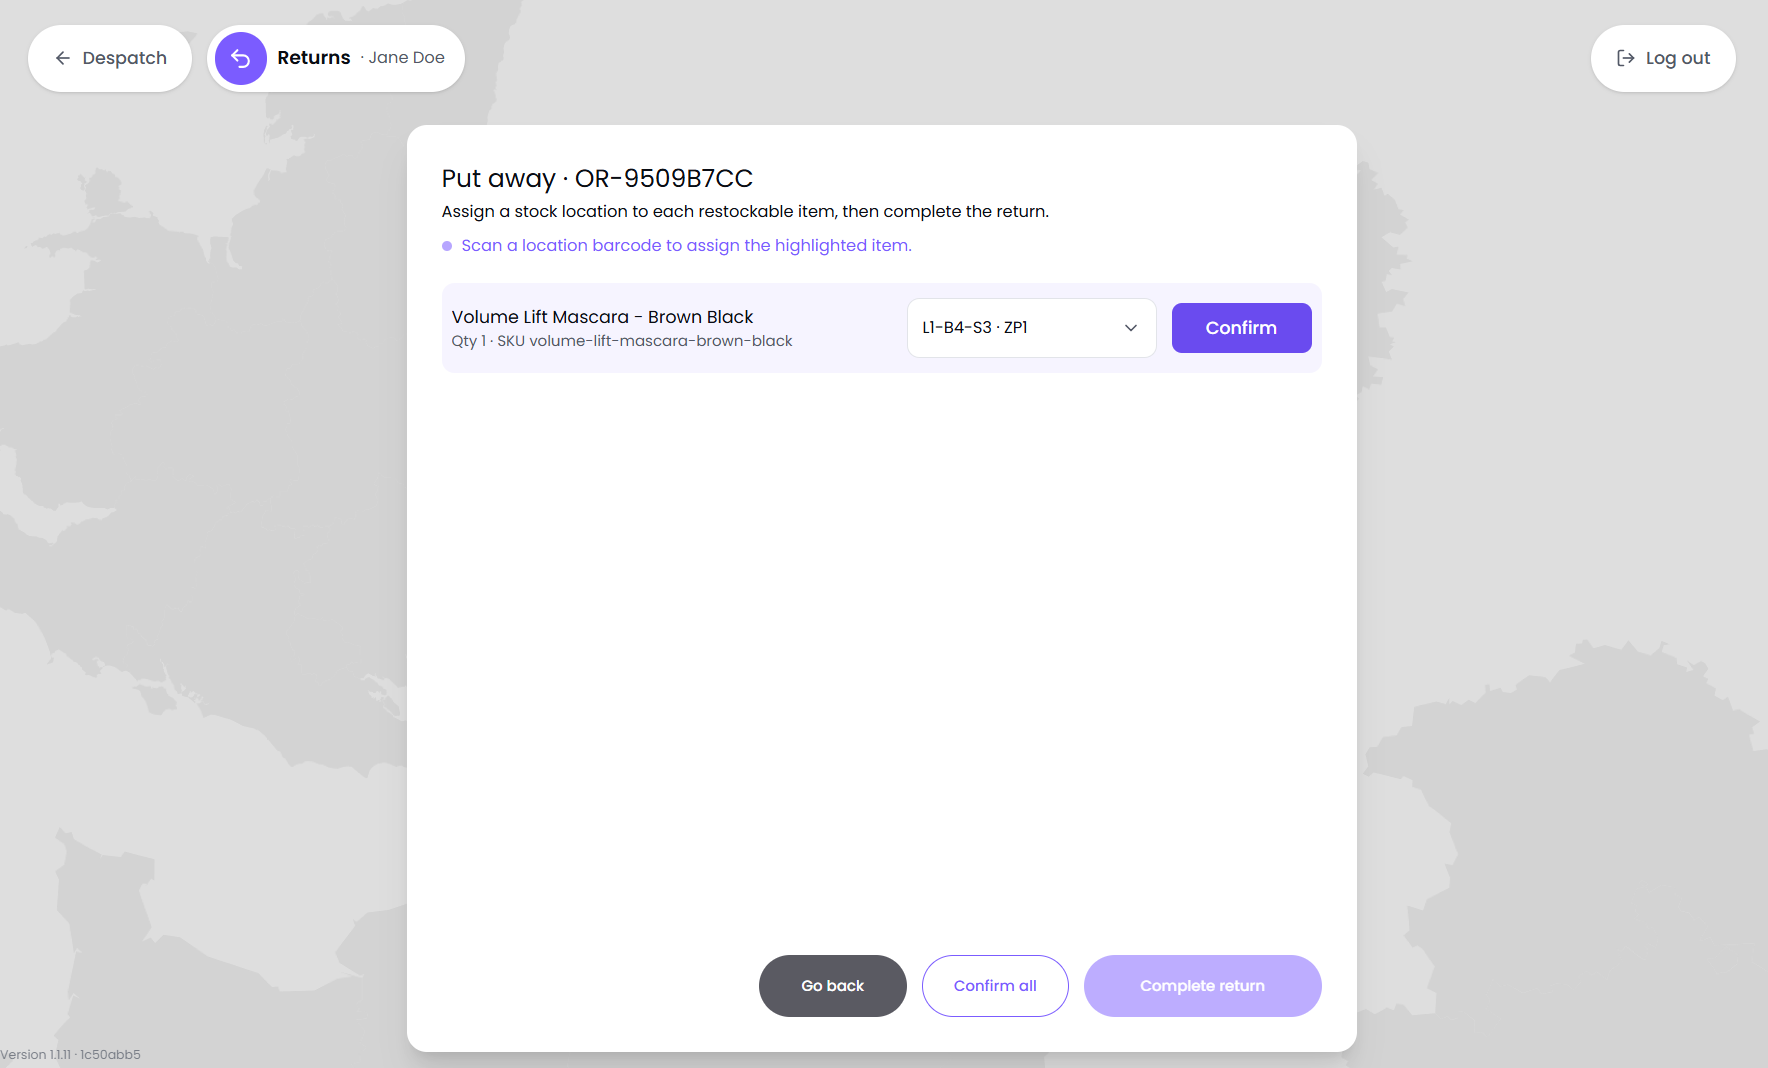
Scan the location barcode for the highlighted item, or pick a location from the list, and select Confirm. Confirm all confirms every line at once.
To send one line to more than one location, choose Split across locations, set the split quantity and pick the new location.
When every line has a location, select Complete return.
The terminal confirms the return is complete. Start the next one with New return.
Note: If the return location has a limit and is full, the extra units go to the overflow location set in Settings. With no overflow location set, the operator chooses where to put them.
Returns Settings at a Glance
These settings shape the returns flow. They are all in Settings on the terminal; see Packing Terminal Settings for the full list.
Best Practices
Choose Reasons Carefully
Return reasons are the clearest signal you get about sizing, product descriptions and packaging. Pick the closest reason rather than a catch-all, and the trends become far easier to act on.
Photograph Anything Not Restocked
A quick photo of a damaged item settles most disputes with customers and couriers before they start.
Keep the Returns Bench Separate
Running returns on their own bench, with their own settings, stops returned stock getting mixed into outgoing parcels.
FAQ
Why can't I find the order?
Why can't I find the order?
Try another detail: the order number, the delivery postcode or the customer's name all work. Check the order was despatched from this company.
Why does the terminal ask for a supervisor?
Why does the terminal ask for a supervisor?
Either the return is older than the Supervisor needed after limit, or you are counting items by hand while barcode scanning is required.
Can I return part of an order?
Can I return part of an order?
Yes. Only count the items that came back. Items already returned on an earlier return are marked as returned, so you can see what is still outstanding.
Why is there no put-away step?
Why is there no put-away step?
Your warehouse does not use locations, so the return is completed straight after inspection.
Need help with a return? Contact the Helm support team with the order number and what came back.
Was this helpful?
Still need help? Share an idea